With the release of the first developer previous of OS X “Mountain Lion” 10.8 by Apple, people have been hard at work to get it working on their PCs (aka “Hackintosh” or OSx86). Fortunately, it’s still very easy to do, and the steps to get it to work closely follow 10.7 “Lion”. You’ll be able to install Mountain Lion from a USB flash drive, too! Also, this guide may look long, but it honestly isn’t too bad. Lastly, check out our demo video showing Mountain Lion fully working.
Requirements
Here are the requirements:
- A copy of Mac OS X – This can be in the form of an existing Hackintosh, a virtual machine within Windows or Linux, or even a regular Mac. If you don’t have any of these things, then find someone who can help you out for a while. I prefer using a virtual machine (I prepared my USB drive with VMware Workstation under Windows 7). Using an already working copy of Mac OS X either in a VM or a native Hackintosh install is HIGHLY recommended, and you’ll see why in part 6.
- A 8GB USB flash drive (or larger) – We’ll be copying the files to the drive appropriately, so make sure that you have a flash drive with enough storage space (8GB or larger).
- A copy of Mountain Lion 10.8 – If you don’t have a Mac Developer Account, then you’ll find torrents of 10.8 around the web.
- 30-60 minutes of time – Depending on how tech-savvy you are, this may be quick, or it may take a while.
- An SSD or HDD to install 10.8 to – For me, I used a 20GB partition on a 64GB SSD to install 10.8 to.
- THIS file – This ZIP file contains everything that you need to get your flash drive properly prepared.
Note: The file for number 6 contains the following:
- FakeSMC.kext
- NullCPUPowerManagement.kext
- OSInstall
- OSInstall.mpkg
- Chameleon_2.1svn_r1820_trunk_10.8.pkg
The first 2 .kext files will fix most Kernel Panic s that you might experience while booting. The 2 OSInstall files will allow you to install 10.8 onto an MBR-partitioned drive. OSInstall came from 10.7.3, and OSInstall.mpkg was modified by me to work properly. Lastly, the Chameleon package is the bootloader that we’ll be using, and has been specifically compiled for use with 10.8.
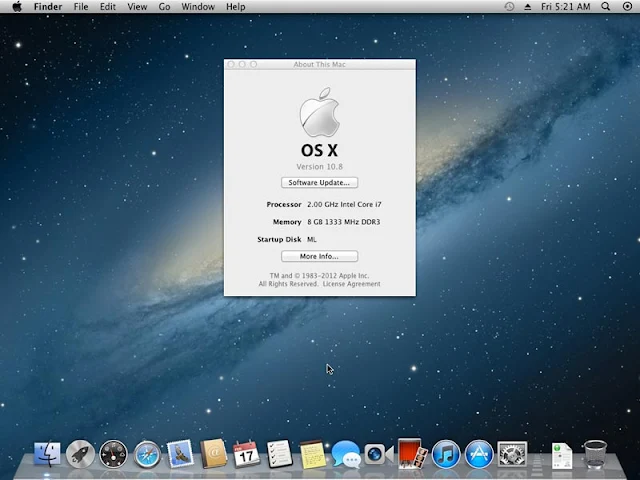
My Specs
My test installation was Success fully done on an MSI GT680R-008US gaming laptop with the following specs:
- Intel Core i7-2630QM @ 2.0GHz
- 8GB DDR 1333 RAM
- Corsair Nova V64 64GB SSD (20GB for 10.8, everything else for Windows 7)
- WD Scorpio Black 500GB HDD
- NVIDIA GeForce GTX460M 1.5GB (Fermi OS X drivers are available)
- Intel Wi-Fi of some sort; not OS X compatible at all (Ethernet works fine)
- Bluetooth (works fine)
- ALC892 audio (drivers are available)
- Internal 1920×1080 display
Part 1 – Preparing your SSD or HDD
If you’re in Windows 7, you can easily make a new partition on an SSD or HDD via the Disk Management program.
- Start>Run (or Windows key on your keyboard plus R).
- diskmgmt.msc (press enter after typing that)
- Find your drive, right-click on it, and go to Shrink Volume.
- Wait for it to calculate the amount of space you can make your partition, and enter in your amount (for an exact GB amount, multiple your desired amount of GB times 1024, so a 20GB partition would be 20480MB).
- Let it make your partition. It will show up as unallocated space.
- Format the new unallocated space as NTFS and give it a label (mine was ML).
- Done!
Part 2 – Formatting your USB drive
Make sure to backup the files that are already on your USB flash drive via Disk Utility in Mac OS X:
- Open up Disk Utility.
- Click on your USB drive in the left sidebar.
- Click on the Erase tab in the middle.
- Choose “Mac OS X Extended (Journaled)” as the format, and give your drive a label (like “ML USB”).
- Click on the Erase… button.
- Done!
- Leave Disk Utility open, as you’ll need it later.
Part 3 – Preparing your USB drive with 10.8
This part is the most time consuming. Using a USB 3.0 flash drive will help things out quite a bit.
- Mount the DMG for Mountain Lion (will be called Mac OS X Install ESD on your desktop).
- Show hidden files in Finder by running the following command in Terminal: defaults write com.apple.finder AppleShowAllFiles TRUE
- Reload Finder by running the following command in Terminal: killall Finder
- Run the following command in Terminal to mount “BaseSystem.dmg” within the 10.8 DMG: open /Volumes/Mac\ OS\ X\ Install\ ESD/BaseSystem.dmg
- Switch back to Disk Utility.
- Click on your flash drive in the left sidebar.
- Click on the Restore button in the middle area.
- For the source, drag “Mac OS X Base System” from your desktop into the empty Source box.
- For the destination, drag your USB drive from your desktop into the empty Destination box.
- Make sure that “Erase destination” is checked.
- Click on “Restore”. This process will take anywhere from 5 to 10 minutes depending on the speed of your flash drive.
- When it’s finished, you’ll end up with 2 “Mac OS X Install ESD” drives on your desktop. Figure out which one is your USB copy (you can right-click > Get Info and use the capacity as an indicator), and open it up.
- Once you’ve opened up Mac OS X Install ESD (the one that’s your flash drive), go to /System/Installation.
- You’ll see a symlink for Packages. Remove it.
- Create a folder called Packages.
- Open up a window of the original Mac OS X Install ESD drive and copy everything within Packages to the empty Packages folder on your USB drive.
- Done! 10.8 is now installed onto your USB drive. Now, we need to modify some of the files on it so that it will properly bootup on a PC.
Part 4 – Adding the fixed 10.8 files to the USB drive
Now, we need to modify some of the files on your USB drive so that it will properly bootup on your PC.
- Extract the contents of “ML_OSx86_Files.zip” to your Mac OS X desktop.
- Copy the 2 .kext files to /System/Library/Extensions on your flash drive.
- Copy the OSInstall file to /System/Library/PrivateFrameworks/Install.framework/Frameworks/OSInstall.framework/Versions/A/, overwriting the file that’s already there.
- Copy the OSInstall.mpkg file to /System/Installation/Packages/, overwriting the file that’s already there.
- Run the Chameleon installation package. Make sure to install this package to your flash drive, and customize the installation so that you have an SMBIOS that best relates to the CPU that’s on your computer (leave the default options checked; just check your SMBIOS).
- Copy mach_kernel from the root of the Mac OS X Install ESD volume and paste it into the root of your flash drive.
- Lastly, copy the Chameleon installation package to the root of your flash drive. You’ll need this in part 8.
- Done!
Part 5 – Installing 10.8 from your USB drive
Time for the fun stuff! We’ll now boot from your USB drive and install 10.8 onto the partition that you made in part 1.
- Boot from your USB drive.
- Once in Chameleon, highlight your flash drive and add -v to the end, then push enter. You’ll see a lot of text fly by.
- Once you get into the installer (assuming your computer didn’t freeze, restart itself, or get a Kernel Panic , in which case you’ll take a picture of the lines on your screenshot and leave it in the comments below), choose your partition to install 10.8 to.
- The installation process will take about 5 to 15 minutes, depending on the speed of both your USB drive and your SSD or HDD.
- When finished, boot back into your already working copy of Mac OS X.
Part 6 – Preparing the installed copy of 10.8
Now, we’ll have to add a couple of files to your fresh install of 10.8. For me, I added a physical partition into my VMware virtual machine of Mac OS X, the same OS that I used when preparing the USB drive and whatnot. If you were using a separate computer, you’ll have to take your drive out and put it into that computer. OR, you can use some terminal commands to copy the files over manually, which I won’t cover.
- Gain access to your installed copy of 10.8.
- Repeat the steps outlined in part 4, but copy the files & install Chameleon to your 10.8 partition instead of your USB drive.
- Done!
Part 7 – Booting 10.8!
Now that everything is finally prepared, you can go ahead and boot into Mountain Lion.
- Boot from your USB drive again.
- Once in Chameleon, highlight your partition that has 10.8 installed. Add -v to it and push enter. You’ll see a lot of text fly by.
- You’ll eventually get to the setup screens for 10.8. Go through that process to setup 10.8.
- Done! Proceed to part 8 to install the bootloader to your partition so that you don’t have to rely on using your USB drive to bootup.
Part 8 – Installing the bootloader to 10.8
This is similar to step 5 in part 4.
- Once in 10.8, open up the Chameleon installation package, and install Chameleon to your 10.8 partition (while choosing your SMBIOS, just like before).
- Done!
This definitely feels shaky and not ready to use as a main OS, at all.
Hopefully it gets better in the next few releases.
Finished!
You’ve Success fully prepared a 10.8 flash drive and have install 10.8 onto it. Changes can be made to this guide in the future. One thing that I’d like to figure out is to somehow incorporate the 2 .kext files into the actual installation instead of copying them over afterwards, or having to copy them from Terminal.
If you’re experiencing any trouble, leave your comment below and I’ll try and help you out.
Feel free to follow Tony Barrio on Twitter!
Post a Comment