Archive for December 2011

How to install iATKOS L2 on Asus P8Z68-V PRO Z68+Asus GTX 550 Ti


Just built a custom system using the components listed below and then installed iAtkos L2 using the Customise options also listed below:

Components
Asus P8Z68-V PRO Z68 Socket 1155 8 Channel HD Audio ATX Motherboard
Corsair Vengeance 16GB (4x4GB) DDR3 1600Mhz CL9 1.5V Non-ECC Unbuffered
Be Quiet 530W Pure Power PSU
WD 1TB 3.5" SATA-III 6Gb/s Caviar Black Hard Drive - 7200rpm 64MB Cache
BitFenix Shinobi Black Mid Tower Case
Intel Core i5 2500K 3.3GHz Socket 1155 6MB Cache Retail Boxed Processor
LiteOn iHAS224 24x DVD±RW DL RAM & Lightscribe SATA Optical Drive - OEM Black
Microsoft Digital Media Keyboard 3000 - USB
Microsoft Comfort Mouse 4500 5 Button - Wired USB with Bluetrack Technology
HANNS-G HH221DP Full HD TFT LCD 21.5" DVI-D Monitor with Speakers


Asus GTX 550 Ti 1GB
GDDR5 VGA DVI HDMI PCI-E Graphics Card


iAtkos Customise Settings used
Bootloader
--- Chameleon 2.1 (default)
Bootloader Options
--- Graphics Enabler (default)
--- Built-in Ethernet (default)
Patches
--- FakeSMC (default)
--- Disabler (default)
--- RTC (default)
--- EvOreboot (default)
Drivers
- Main Hardware
-- SATA/IDE
--- AHCI SATA
- Sound
-- AppleHDA < Checked this Box to select all sub boxes
- USB < Checked this Box to select all sub boxes
- VGA < Left Unchecked; Nothing Selected
- Network
-- Wired
--- Intel Gigabit

I could probably refine this install but as a first install it works well, Screen res is high, network works nicely, sound is good. Boots up fine and quickly, actually faster than my mates G5 with Lion

I think this system would probably run very well with a dsdt.aml modded, unfortunately this system, is destined to be a Windows 7 x64 PC for a customer, I just wanted to see if iATKOS L2 would install ok. I have to say it was a nice straight forward install, I didn't have to put any boot flags in not even -v

oh and all the components came to £850 not a bad price for a New Hackintosh

Update: just checked the customise option GF100 under VGA and that works just as well.

iATKOS L2 Lion 10.7.2: Fix for most common issues ;)

Simple Troubleshooting guide:


At times after installation, your system may not work properly as in - it may restart, not boot at all or hang at a certain point. This is quite normal and there are many ways for it to be fixed. It varies from one case to another case. However this basic troubleshooting guide would help you to fix most of the common problems.


- If you're facing hangs, freezes or kernel panics (which is present as a shutdown symbol on the screen just after boot) type in "-v" (without quotes) in the boot command of the bootloader. This would give you verbose output which is useful for the solution.


- "Waiting for root device" - It means that OS X doesn't see your hard disk or boot device. You can face with this during dvd boot or after system install during hdd boot.

Change your SATA mode from IDE/RAID to ACHI by your BIOS setup and also you need to check other BIOS settings that might be the usual problem, read the "mickey mouse guide" on our forum for BIOS settings. This usually does fixes the problem. If not, then you can try to install using a USB media. You need to restore the L2 image to USB media and install chameleon to it. You can do it on both OS X and Windows systems, search our forum or google for instructions. If still no light, then you may have an incompatible hardware for this OS.


- White or black screen during HDD boot - This means that OS X doesn't see your monitor properly or your graphics card isn't working correctly. Firstly boot with "-x -v" to reach up to GUI, then you can search the internet for the solution for your graphics hardware. Secondly reinstall the OS again, but this time make sure you don't select any graphic drivers. If you can login to GUI, you know what to do so.


- Keep in mind that sometimes certain kext patches may not work for your system even though they are the same chipset but a slight variation may cause it not to work on your PC. The result may be a kernel panic again, reinstall back but this time don't select any funny patches/drivers. This would resolve your problem.

By Ufuk Durgun

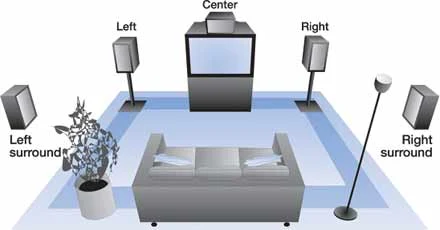
Surround 5.1 audio [ Fix #1 ]


You should definitely read through it, but here’s the gist for movies that contain AC3 audio files:
Install a copy of the free Perian QuickTime plug-in on your Mac. String an optical cable between your Mac and a compatible receiver. Launch Audio Midi Setup (found in the Utilities folder) and in the audio output area select Digital Out from the Source pop-up menu and 48000.0Hz and 2ch–16-bit in the Format area.
Launch the Terminal app and enter 

defaults write com.cod3r.a52codec attemptPassthrough 1
 Press Return.

If iTunes is running, quit and relaunch it.
Locate the movie you want to view, and play it with iTunes’ Volume slider set to its highest level. Also be sure that the equalizer is off. Place your cursor over the movie so that the on-screen controls appear, click on the small bubble icon, and choose the surround sound track. With a little luck, iTunes should now play the movie with surround-sound audio.

source:

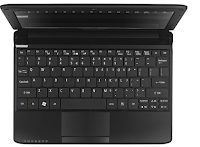
How to install iATKOS L2 on eMachine M350 Mini Netbook [Guide]


Here are the steps to installing iAtkos L2 onto an eMachine M350 mini netbook.

1. Burn the image of the iAtkos L2 onto a usb
2. Boot using the iAtkos L2 dvd with the usb attached and then select the usb to boot right off of it
3. Select your language
4. Using the Disk Utilities partition your HD. In this case I used MBR but you can use GUID if you like
5. Use the follow for installattion
   *Chameleon 2.0
   *Graphics Enabler
   *PCI Root-1
   *32 bit
   *Built in Ethernet
   *Fake SMC
   *Disabler
   *RTC 32-Bit
   *EvoReboot
   *IOPCI Family
   *Atom Kernel
   *AHCI SATA
   *Voodoo HDA 2.2
   *USB 2.0
   *Voodoo keyboard and mouse
   *Select all wifi boxes
6. Your install will last about 12 minutes.
7. The 1024x600 display settings will be automatically detected but will have no hardware acceleration and will run natively.
8. Enjoy iATKOS L2!!!
9. I am currently waiting for someone to come up with the Video Kext which is a GMA 3150 which has caused several headaches in the past editions of iAtkos v2 S3 and so on. But for some reason iAtkos L2 detected the correct display setting but like I said before only natively.
10. Any comments please feel free to e-mail me.
11. Copied from iATKOS.tk

How to install iATKOS L2 on eMachine M350 Mini Netbook [Guide]


Here are the steps to installing iAtkos L2 onto an eMachine M350 mini netbook.


1. Burn the image of the iAtkos L2 onto a usb
2. Boot using the iAtkos L2 dvd with the usb attached and then select the usb to boot right off of it
3. Select your language
4. Using the Disk Utilities partition your HD. In this case I used MBR but you can use GUID if you like
5. Use the follow for installattion
   *Chameleon 2.0
   *Graphics Enabler
   *PCI Root-1
   *32 bit
   *Built in Ethernet
   *Fake SMC
   *Disabler
   *RTC 32-Bit
   *EvoReboot
   *IOPCI Family
   *Atom Kernel
   *AHCI SATA
   *Voodoo HDA 2.2
   *USB 2.0
   *Voodoo keyboard and mouse
   *Select all wifi boxes
6. Your install will last about 12 minutes.
7. The 1024x600 display settings will be automatically detected but will have no hardware acceleration and will run natively.
8. Enjoy iATKOS L2!!!
9. I am currently waiting for someone to come up with the Video Kext which is a GMA 3150 which has caused several headaches in the past editions of iAtkos v2 S3 and so on. But for some reason iAtkos L2 detected the correct display setting but like I said before only natively.
10. Any comments please feel free to e-mail me.
11. Copied from tonymacx64.blogspot.com.com

Multiboot with iATKOS L2 Lion 10.7.2

iATKOS L2 Multiboot:


iATKOS L2 has no integrated procedure for multibooting but preparing a multiboot GPT or MBR system with this release is easy.

Here is a ''How To'' for GPT and MBR triple boot including Mac-Win-Linux. iATKOS L2, Debian GNU/Linux DVD and Windows7 DVD installers are used in this example.


- MBR (Master Boot Record) triple boot -

- Nearly all PC's work on MBR partitioned harddisks, check it with Disk Utility, if so do no touch it. If it is GPT then you need to repartition your harddisk by loosing all the data in it. Click to partitioning options, select MBR and do the partitioning.

- Create 3 or more partitions by using iATKOS Disk Utility or Parted Magic Live CD. Mac OS Extended Journaled (HFS+) format for OS X target, MS-DOS (Fat32) for the others. OS targets must be one of the first 3 partitions creating with Disk Utility.

- Add boot flag to Windows or Linux target and install the operating systems in any order you like.
For windows, make sure the windows target disk is the first preceding disk by your BIOS, unplug the other harddisks if needed. This is a general windows issue.
For linux, do not install linux bootloader to MBR, install it to linux root.

- Boot iATKOS L2 and install OS X to target as usual.

- If Windows fails to load then you may need to repair Windows (win7 or vista) (mostly you will not face this issue): Add boot flag to Windows partition, boot Windows DVD, select repair, add boot flag to OS X partition.

- You can also add boot flag to Linux partition to use Linux bootloader for multiboot manipulation if you want to.

Now you have triple boot on MBR.

Note: Adding boot flag to MBR partitions: Boot Parted Magic Live CD, right click to partition, select flags and click to boot.


- GPT (Guid Partition Table) triple boot -

- Check the partition table type with Disk Utility. If it is not GPT then repartition the drive and change the partition map scheme to GPT by pressing partition options. You will loose all the data on target disk by repartitioning.

- Create 3 or more partitions by using iATKOS Disk Utility. Mac OS Extended Journaled (HFS+) format for OS X target, MS-DOS (Fat32) for the others. Windows and Linux targets should be of the first 3 partitions.

- Boot Windows Media and install it to its FAT32 target.

- Boot iATKOS L2 and install OS X to target as usual. You have dual-boot with OS X and windows right now.

- Boot Linux media and install the operating system (OS) to its FAT32 target.
Do not install the linux bootloader to MBR, install it linux root.
Do not change the boot flags.
Do not modify the partition table, it can be risky for some distros, just erase the target and do the install.
Use grub2.

- Now you can boot to OS X and Linux using OSX86 bootloader which boots by default, but windows fails at this stage because Linux installation broke the hybrid GPT, so we will bring it back on this step.
Boot iATKOS L2 and enter "gptsync /dev/diskX" command on terminal. X is the BSD number of your target disk, run disk utility and right click on your disk, you will see it.

Now you have triple boot on GPT. By default OS X bootloader will take the control by these steps. It can boot all of them by just selecting. If you want linux or windows to take the control of multibooting then go on reading, it is described below.

All the OS' are independent by this way, you can re-install each of them one by one when needed. You just need to care about 2 things:
- gptsync will be needed after Linux re-install
- you need to re-install OS X bootloader after Windows re-install. Boot iATKOS L2, install the bootloader using terminal. If you use linux for multibooting then this step is not necessary.

There are more combinations to make multiboot work on especially on GPT. If you know the procedures as well, there is no thing like an uncoverable multiboot error. i.e. keep in mind that hybrid GPT may fail when dealing with linux stuff, then windows will not boot. Do not use parted magic live cd for Hybrid GPT, it breaks Hybrid GPT causing an unbootable windows. There comes the gptsync, it creates a fake MBR code on GPT drives that make Windows feel like it works on MBR partitioned hdd. You can always apply gpysync if hybrid GPT is broken somehow. After bringing back the hybrid GPT partition using gptsync, windows will work again. After gptsync, you can add boot flag to other partitions by using OS X or Linux fdisk if you like to boot from another OS. i.e. booting from linux and using grub for multiboot manipulation instead of chameleon.
For OS X fdisk, boot iATKOS L2 and open terminal:
fdisk -e /dev/diskX # X is the BSD number of your target disk
p # p is the fake MBR partition list
f Y # f for adding boot flag to the target partition, Y is the partition number you want to boot from
w # w to write changes
q # q for quit.

In this multiboot example I created 4 volumes, 3 for OS' and 1 for storage. OS volumes are first 3 ones. As you see on this fdisk print out and disk utility screen below, fdisk lists the 4 partitions of fake MBR of my hybrid GPT. You can not see the "Data 2" partition (disk0s5) there because it is the 5th one. 1st partition is the hidden efi, for this reason the OS' are to be installed to first 3 volumes.

Enter 'help' for information
fdisk: 1> p
Disk: /dev/disk0 geometry: 30401/255/63 [488395055 sectors]
Offset: 0 Signature: 0xAA55
#: id cyl hd sec - cyl hd sec [ start - size]
------------------------------------------------------------------------
1: EE 1023 254 63 - 1023 254 63 [ 1 - 409639] <Unknown ID>
2: AF 1023 254 63 - 1023 254 63 [ 409640 - 97656256] HFS+
3: 07 1023 254 63 - 1023 254 63 [ 98328576 - 97654784] HPFS/QNX/AUX
*4: 83 1023 254 63 - 1023 254 63 [ 195983360 - 97654784] Linux files*
fdisk: 1> _

--------------------------
disk utility layout:
250.06GB WDC WD250…
-OS X
-Windows
-disk0s4
-Data 2
--------------------------

Unmounted disk0s4 volume is ext4 linux partition (hd0,4) in this example. I added the boot flag to Linux partition using OS X fdisk and modified the grub.cfg file to boot all of them via grub2.

### here is the grub.cfg lines of this example for multibooting
menuentry "Lion" {
insmod hfsplus
set root=(hd0,2)
multiboot /boot
}
menuentry "Windows 7" {
set root=(hd0,3)
chainloader +1
}
menuentry "Debian GNU/Linux……
###

By Ufuk Durgun

About iATKOS Project [ Wikipedia ]

OSx86 (from Mac OS X and x86) is a collaborative hacking project to run the Mac OS X computer operating system on non-Apple personal computers with x86 architecture and x86-64 compatible processors. The effort started soon after the June 2005 Worldwide Developers Conference announcement that Apple would be transitioning its personal computers from PowerPC to Intel microprocessors.

A computer built to run this type of Mac OS X is also known as a Hackintosh, a portmanteau of the word "hack" and the name of Apple's main brand of computers, Macintosh. Hackintoshed notebook computers are also referred to as "Hackbooks".

uphuck-iatkos.png (280×202)The Apple software license does not allow Mac OS X to be used on a computer that is not "Apple-branded". The legality of this form of tying is disputed by companies such as Psystar, Bizon computer, PearC and MacPC who have attempted to release products using Mac OS on non Apple-machines. However, Apple claims the methods it uses to prevent Mac OS X from being installed on non-Apple hardware are protected by the DMCA, and in November 2009 won a summary judgement against Psystar on these grounds.

Read more

From Wikipedia, the free encyclopedia

iATKOS L2: GT 240 and OS X 10.7.2 [ SOLUTION ]


iATKOS L2 has no native support for the GT 240, but here we share with you an easy solution:

For common booting issue, try:

1. FIRST:

-v arch=i386 npci=0x2000 PCIRoot=Yes DSDT=No


2. THEN:

Download from TonyMacx86 the amazing tool called MultiBeast 4.2

3. FINALLY:

If you could, donate a cup of coffe to UPHUCK and/or TonyMac


Enjoy ;)

MacMan released Chimera 1.7.0 [iATKOS L2 Compatible]

MacMan released MultiBeast 4.2.0 [iATKOS L2 Compatible]

How to install iATKOS L2 10.7.2 on Samsung NC110


For creating the bootable usb stick:
GoNu wrote:Reporting succesful installer boot with L2.

What I did:

iAtkos L2
the included mach_atom
chameleon 2.1 r1716
chameleon wizard 3.4.3
REPLACED AppleACPIPlatform and IOPCIFamily kexts with ones from snow leopard
did this:

CODE: SELECT ALL
chmod -
R 755 mach_kernel
chown -R root:wheel mach_kernel
chmod -R 755 /System/Library/Extensions/
chown -R root:wheel /System/Library/Extensions/
rm -rf /System/Library/Caches/*

REMOVED ApplePS2Trackpad.kext
and saved a new org.chameleon.Boot.plist to usb root (may sound crazy but this is what I did) with these contents:
-GUI
-Time out 5
-use kernel cache
-npci=0x2000
--force64
-ethernet built in
-pciroot=1
-system type 2-laptop
-graphics enabler
-graphics mode 1024x600x32

then booted with flags "USDT=no -v" in EXACTLY THIS ORDER AND CASE.

Some other netbooker please confirm this. :) Will report to succesful installs if I can get this finally running from hd.

And listing the hangs I got on the way, thus confirming solved with my hardware and these options used. ;)
- PCI Configuration end
- DSMOS has arrived
- AppleALPSGlidePoint
- one more I can't remember, was result from wrong bootflag order (-v before USDT=no)

Important: it can hang randomly even with these. Try at least 2-3 times.


When the installer appears, wipe the disk, then select customize. Keep all default, and in addition select:
- PCIRootUID = 1
- Atom kernel
and maybe something else too, I went for the minimum because encountering errors.

After installation boot back to the installer, open terminal, mount -uw / and replace the installed system's AppleACPIPlatform and IOPCIFamily kexts with the ones used creating the usb. Also put LegacyAppleRTC.kext (first google result) in /Extra (this fixes the RTC: Only single RAM bank hang) and repair all permissions. It should then boot up from hd.
Notice: for me it seems not to work if you copy the kexts from the installer usb's SLE. Put them to usb root and copy from there.

So far no networking (any kind), no sound, no touchpad/keyboard, no graphics driver (resolution is fine 1024x600x32 but no QE). Instead, my memory is now showing up fine (2Gb 1333MHz DDR3) which was 667MHz DDR2 in S3v2.
Now I'm doing a fresh TM backup of this system, just in case.


source

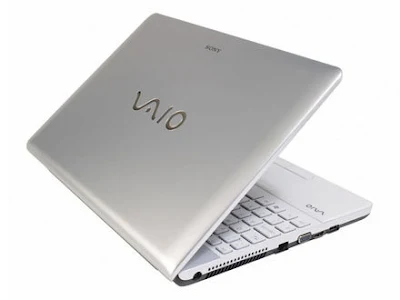
How to install iATKOS L2 10.7.2 on Sony Vaio VPCEB3J0E/W


Have to boot with
CODE: SELECT ALL
-v npci=0x2000 USBBusFix=Yes

And use a USB mouse during install.

Post Install, first boot to single user mode. Remove AppleIntelHDGraphicsFB.Kext, AppleIntelHDGraphics.Kext and AppleIntelSNB*.Kext, or you will get no video with a 4500MHD or a 5700MHD.

Reboot from single user mode
CODE: SELECT ALL
Reboot


Next, Boot with
CODE: SELECT ALL
-v npci=0x2000 USBBusFix=Yes EHCIaquire=Yes UHCIreset=Yes arch=i386 "Graphics Mode"="1366x768x32"


Proceed, using USB mouse again (as Synaptics touch pad does not work properly with 10.7.2 ApplePS2Controller.Kext)

Setup a new user, then log in to os X.

Replace the Synaptics Kext with the one from: Here, then use Kext utility to repair permissions (Utilities/Tools)

Setup your bootloader using either Champlist (in Utilities/Tools), or the PrefPane in System Settings.
I will post my chameleon plist is anyone gets stuck with this model. I have a feeling USB is going to give you some trouble. Adding the key npci with string 0x2000 does not work - this has to be added as a kernel line argument.

Out of the box: Wireless (thanks for including AR9285 driver), MotionEye Webcam, Bluetooth, Card Readers, Sound, Keyboard, anything else not mentioned.

Only two things that don't work OOTB is Marvel Yukon Ethernet controller, Touchpad and IntelHD graphics.

Unfortunatley with this laptop, it is impossible, currently to activate QE/Ql acceleration due to the 5700MHD GPU. There is a method which works on laptops that contain the second nVidia card too, but not single Intels ATM.

Enjoy :)

How to install iATKOS L2 10.7.2 on HP 8440p

Edit: updated to include MultiBeast piece I had left out and to add info on battery icon kexts.
Please use the latest kexts file called HP 8440p kexts under the Downloads - Miscellaneous section.
This newer file has the same kexts as the first one I posted and also the battery kexts.

The core process steps boil down to the following phases:


Items needed, software to download on windows 7 PC
- a USB keyboard and a USB mouse, standard PC models, as the kb/trackpad do not work OOB but require a kext
- two USB sticks, one for a faster way to install OSX, the other for the transfer of kexts
- Download iATKOS L2 via torrent
- Download TRANSMAC to W7 PC
- Download dmg2img to convert dmg file to iso file
- Registration on this site to download the latest kext zip file I posted in the Downloads / Misc folder
- Registration with tonymacx86 so you can download Multibeast

Preparation of OSX DVD and USB stick with OSX image on windows 7 PC
- Convert the iATKOS L2 DMG file to an iso file with dmg2iso (simple syntax, see their help /?)
- Burn the new L2 iso to a DVD – this will be used as a boot disk, similar to iBoot
- Use Transmac to format USB stick with the dmg – this will be used to install the Lion OSX faster
- I think you just right-click on the USB stick name in the left panel and select "format with image" and you pick the iATKOS dmg file for this directly.
- you now have the DVD to start the boot process and the USB stick to make the whole deal much much faster to do.

Preparation of kexts files on yet another USB stick
- copy the un-zipped folders of the HP 8440p zip file to another USB stick, which should be FAT32 format
- download Multibeast from the tonymacx86 site and also copy the files to the USB stick
- you now have this ready to go for the post-installation steps

Install process on laptop
- Connect a usb keyboard and mouse to the hp 8440p as laptop kb/trackpad do not work
- Load Iatkos L2 disk in normal DVD upgrade bay
- Insert the USB stick with same image in a USB port
- Boot off DVD through F9 boot options
- After iATKOS menu shows up, press eject button on optical drive so DVD sticks out and is no longer active
- Move arrow to icon for USB stick as source of the OSX image, this will make the process much faster to install OSX
- For boot options of Iatkos, I used type busratio=18 graphicsenabler=yes
(The ratio is for my i5-520m processor, yours may be different)
- Use Disk Utility at the beginning of the install process to erase the partition on your drive
- Create a new one and format HD for use as Mac HFS Journaled (top option in list I think)
- select the logical options in the install process (register later, do not transfer, etc)

Add Ethernet connectivity
- Insert the USB stick with the kext files into HP laptop which is now running OSX
- Click Finder, then Go in menu at top of screen and then select Computer to see Lion HD icon
- Click on name of USB stick with Ethernet kext
- Right click on kext file and click copy
- Click Back arrow to go up one level and see Lion HD icon again
- Click on Lion HD icon and then System, then Library and then Extensions
- Folder should have many kexts in it - right click Paste Item
(This is where OSX drivers are located)

Select some Multibeast options
- Click Finder to navigate to the USB stick
- Click on the Multibeast installer package you also copied on the stick previously
- Under Miscellaneous, select ElliottForceLegacyRTC, EvOreboot, FakeSMC, NullCPUPowerManagement
- Click Continue and then Install

Confirm Ethernet connectivity
- connect laptop directly to network with Ethernet cable
- Reboot machine by clicking Apple icon in top left and selecting Shut Down or Restart
- Press power button to start laptop again if needed
- Go to Apple icon and press About this Mac – System Report - Ethernet cards
- confirm successful load of Ethernet kext in systems report
- Click on Safari and go to some website to check connectivity

Get ready to install additional kexts to fix remaining functionality
- - in Finder on the laptop, click Go and then Utilities
- Navigate to the Tools folder, select Champlist by double clicking
- This was installed by iATKOS
- click on the Kext utility and change the Destination to System/Library/Extensions (S/L/E)
- leave this program open
- right click on the Finder icon in the dock and select New Folder Window to open another Finder window

Install keyboard and trackpad kexts in S/L/E, make sure to select right destination in kext utility
- in the top menu, select Go and then Computer
- navigate to Lion (or whatever you called the drive) and then again to S/L/E folder
- delete AppleACPIPS2Nub.kext by right clicking and selecting move to trash
- do same for ApplePS2Controller.kext
- click on USB stick with kexts in left panel of Finder window and navigate to HP 8440p kexts folder you copied there
- navigate to 1448-PS2Synaptics-Keyboard-32+64 folder
- click and highlight the first kext and drag it over to the Kext Utility you have open in another window
- drop it and click the install button
- do the same for the next one so you have effectively replaced the two original files with the two from the USB stick
- close all windows
- go to the Apple icon at the top left and select restart
- disconnect the USB keyboard and mouse
- let the machine restart
- confirm that keyboard, stickpoint and trackpad work.
- I had to set the mouse sensitivity to Slow under Tracking Speed in the Mouse panel under System Preferences under the Apple icon menu to get the trackpoint speed to be just right for the screen size.
- scrolling a large webpage for instance with your finger on the right side of the trackpad also works.
- special gestures that are possible on an original trackpad do not seem to work (not a big deal IMO)

Install sound in S/L/E folder, make sure to select right destination in kext utility
- have the Champlist kext utility ready as described above, destination S/L/E again
- install the AppleHDADisabler.kext first by dragging it over and clicking install
- reboot again, not sure if necessary but can't hurt
- get windows and kext utility ready again for VoodooHDA.text
- install in the same fashion as above
- navigate to the USB stick in Finder and right click the VoodooHDA.prefpane file
- navigate to S/L/PreferencePanes folder and right click to Paste item
- reboot machine

At this point, there should be no Kernel Panics, the machine should load OSX just fine and sound should work. The volume buttons below screen work but the mute button does not. It does display that is is muting but the sound level does not change. The microphone works, webcam works, Facetime works, etc.

Note: the VoodooHDA kext in the file I uploaded is a special one that was modified for HP machines by someone. It is not just the normal one from the project library. I have found that VoodooHDA files can easily mess up your install, so for the HP 8440p with the IDT audio chip, use the file from the zip file I provided, unless you can find a better one, then let me know!

Install three kexts to enable battery/power icon in menu bar
- use the kext utility in Champlist, go use Finder – Go – Utilities – Tools – Champlist
- select Kext utility, select S/L/E as the destination
- select Back up Original Kexts as option
- Click the Finder icon in the dock and locate the kexts folder with the HP 8440p kexts
- Click and drag each kext from the Battery folder to the Kext utility and select Install
- The AppleACPIPlatform is an earlier version, pre Lion, that enables the battery icon
- The AppleACPIBatteryManager kext is also required.
- Last but not least, install the VoodooBattery kext again with the Champlist kext utility into S/L/E
- Under the Systems Preferences tab (under Apple icon), go to Energy Saver and select Show Battery Status in menu bar to display the status icon
- Just in case, also repair the permission with Finder – Go – Utilities – Tools – Kext Utility (different from the utility that is part of Champlist, which installs kexts.
- Once the repair permissions process is complete, restart the machine to load the new kexts
- Once rebooted, confirm the correct display of the battery status and select the preferred display mode, percentage or time.

Result
At this point you have a very stable and fully functioning OSX 10.7.2 system. I did apply the few regular updates that were available and they worked fine. I have no idea what will happen when 10.7.3 comes out and you apply the update.

Disclaimer
I am only interested in this project to evaluate the usability of OSX and Mac solutions prior to purchase of an original Apple system. I already own 5 Apple devices, but not a Macbook or OSX device. So before I make that decision, I want to be fully aware of the benefits of OSX over w7 or Linux. BTW, a new favorite Linux distro is Zorin.

I also continue to use Windows 7 on the same machine, booting off an SSD in the Upgrade Bay, where I installed a module for SSD or harddrives in place of the standard DVD module. When I boot, I hit F9 to select either Windows or OSX. So for now, I have great flexibility and can evaluate OSX at my leisure.

Thanks to all others who made this possible.
The effort to figure out how to get my 8440p to work properly took many hours of research and trial and error, generally late at night or overnight. I hope to save others time, as I found only two references to partially successful attempts for this model elsewhere, one from the SL days and one under Lion but that person indicates they sold their machine and bought a Macbook instead now. I wanted to provide the same level of detail as snoop244 who documented the SL install process.

I welcome any revisions and changes to the procedure to define the exact process that works for the 8440p with the Nvidia NVS3100m card. (not sure if regular Intel HD graphics would work for instance)

HOW TO MAKE READ-ONLY .DMG FILES WRITABLE [ Developers ]


This post is very useful if you have ever needed to make a readonly Mac .dmg file writable. Say for instance that you wanted to create a Mac OS X install disk, then mount it up writable, add something to it and then save it to be used to install OS X in say “VMware”. Listed below are the steps to make this happen:


From Terminal:


###This creates a writable dmg image###
hdiutil convert nameoffile.dmg -format UDRW -o nameoffile_writable.dmg
###This tells you the size of the image###
hdiutil resize -limits nameoffile_writable.dmg
###This resizes your dmg image so that you will have space to add stuff to it. Make sure you substitute the first number from the previous command and add to it sufficiently for the 9999etc. number###
hdiutil resize -sectors 999999 nameoffile_writable.dmg
###This mounts the new dmg writable image so that you can add stuff to it###
hdiutil attach nameoffile_writable.dmg


source:
Download Kexts

iATKOS LION AND "Kernel Cache" [ SOLUTION ]

Kernel Cache

Add the following code to your org.chameleon.boot.plist file to use:

<key>UseKernelCache</key>
<string>Yes</string>

You can also use MultiBeast 4.x to do this easy!


By TonyMac :)

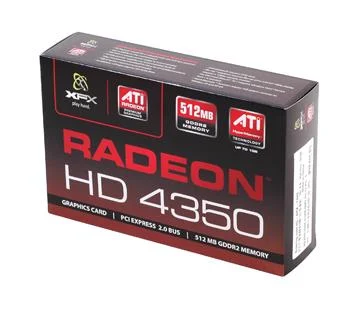
Installing ATI 4350 Graphics Card on Mac OS X lion [ Guide ]


1. Shutdown and Install the Graphics Card ATI Radeon HD4350 and boot

NOTE: Boot with normal mode. If the normal mode doesn't work then boot into safe mode. And if safe mode also doesn't work, then remove the card and continue with the steps below. I however, did not have to boot in safe mode, I just booted in normal mode with my Graphics card already installed.

2. Open the EVOenabler and ATY_init folder, Open Applications folder in a seperate window. Select both the files in EVOenabler and ATY_init folder and drag them over to 'Kext Utility' found in the Applications folder in order to install them automatically with permissions also being repaired automatically.

3. Open ATI4350 folder and copy paste the file to Extra/Extensions folder.
4. Open the Controllers folder and again Applications folder opened in a seperate window, select all the files from Controllers foler and drag them over to 'Kext Utility' in order to install them automatically with permissions also being repaired automatically.
5. Open 'Kext utility' again by double clicking it, type your password and let it repair the permissions automatically.

NOTE: It's better to run the 'Kext Utility' last time just to be on a safe side that the permissions gets repaired. Although you are repairing the permissions each time you drag the kexts to 'Kext Utility'.

6. Restart and at the bootloader, boot with -v. You should see ATI4600Controller might not load (Thats normal), you should also see ATY_Init with card 0x- and random few numbers, this indicates that the installation was successfull.

VERY IMPORTANT NOTE: I had a very tough time installing this card and had almost given up. But I beleive in 'try, try... untill you succeed' hence in case the above procedure does not work and after installing the card you get a BLANK GREY SCREEN with just a big arrow, you can then perform the extra step 7 (Which I had to do since, I was getting a BLANK GREY SCREEN with a big mouse pointer).

7. (THIS STEP IS ONLY FOR PEOPLE WHO GET A BLANK GREY SCREEN) When performing the 2nd Step from above, Open the EVOenabler and ATY_init folder and ONLY SELECT ATY_Init.kext and drag it over 'Kext Utility' in order to install it.

Thanks to alexmathayes

Configure the BIOS before install Hackintosh :)

The BIOS settings for every motherboard looks similar but never exactly the same. For that reason we can't tell you, command-by-command, where to go to find and make certain adjustments. Here are the settings you will need to adjust (or at least verify) in your BIOS to make your hardware hackintosh-friendly:
  • Disable Quick Boot
  • . You may have to look around for this, but we've often found this in a section titled Advanced BIOS Settings. Just look for a Quick Boot or Fast Boot option and ensure it is set to disabled.
  • Configure SATA as AHCI
  • . By default, your motherboard will configure SATA as IDE and you'll need to change this to AHCI. In some cases you'll be asked if you want to do this when you boot up for the first time. If so, choose yes. If not, go into your BIOS and look for this setting as you'll need to make the change for everything to work smoothly.
  • Change the Boot Device Order
  • . Your BIOS will default to a specific boot order, which means it'll look for a startup volume (where the operating system lives) in various places until it finds one. The boot order is the order in which it checks each location. In general, you want to set your optical drive to first boot device so you can easily boot to a disc by simply putting it in the drive and turning on your machine. The second item in the order should be the hard drive or SSD where you're going to install OS X. The order beyond that isn't terribly important and entirely up to you.
  • Adjust the Hard Disk Boot Priority
  • . Some BIOS settings pages will also have a setting called Hard Disk Boot Priority, which is used to identify which hard drive to try and boot from first if there are multiple drives in the machine. If you install more than one drive in your hackintosh, be sure to set the Hard Disk Boot Priority to the drive where OS X will be installed.